Friendsgiving

Although the preparations for Thanksgiving were a little hectic, the end result was lovely and I couldn’t have asked for more delicious food, better company, or a warmer home away from home than what I had last night. Here are some of my favorite photos from the night:

Image

Image

Image

Image

Image

Image

Image

Image


Pumpkin and Cranberries

Two years ago I spent my first Thanksgiving away from my family, but surrounded by a newly adopted family. I spent that afternoon with my Brazilian host family in their home in Fortaleza preparing mashed potatoes for the dinner my fellow american students were preparing. My host mother was familiar with the concept of Thanksgiving because of an episode of “Everybody Hates Chris” which had made it to Brazilian TV. Although I did not want to burden her with more cooking on top of what she had already prepared for her family’s dinner, she was eager to help me make the potatoes the “american way” and even cut the skin off of a tomato to make a rose to place on top of the potatoes so they would be pretty for my friends. Later, I traveled on the bus with my glass bowl of mashed potatoes inside a backpack to the apartment where my friends were staying and we enjoyed a dinner of spinach, stuffing, mashed potatoes, and rotisserie chicken, while playing “pin the tail on the turkey” and “name your favorite president.” It was silly and fun and I loved that although we were from different backgrounds we could all share in one holiday celebrated for the purpose of giving thanks.

This will be my second Thanksgiving away from home. This time I am in Mexico and will be celebrating with other Americans and Mexicans in the name of bilateral understanding and giving thanks for this opportunity to live and work abroad. The tables have turned back home, and my parents will be hosting some Brazilian graduate students and their families. 

We split the Thanksgiving dinner between the four of us Fulbrighters in Guadalajara, and I am in charge of cornbread, cranberry sauce, and pumpkin pie. The cornbread was easy, I used the same recipe from this post but made them as muffins. The cranberry sauce and pumpkin pie turned out to be much more of a feat. I thought I saw fresh cranberries at Superama last week, but now I am suspecting they were actually grapes or another berry. One of my friends saw canned cranberry sauce at Sam’s Club when she got the turkey, but I went to four different stores and was unable to find it. Canned pumpkin was no where to be found, and I luckily found fresh pumpkin at Walmart. I stressed myself out too much trying to find these prized ingredients that I became overcome with excitement when I found a seemingly pumpkin pie with a golden orange top which just turned out to be cheesecake. I was also unable to find frozen pie crusts, I only found graham cracker crusts, which just aren’t right for pumpkin pie. 

Luckily I live in the age of the internet and many ex-pats have celebrated Thanksgiving abroad and posted their recipes online to help others. The pumpkin pie was pretty easy to put together once I found an easy recipe for pie crust and roasted the pumpkin. I found this fantastic recipe for cranberry sauce made from craisins and cranberry juice from Ron Mikulak. Perhaps I am too excited about cranberry sauce, but it brightened my entire day to be able to make one of my favorite Thanksgiving side in less than ideal conditions.

Image

Three variations of cranberries: craisins, cranberry juice, cranberry marmalade. None of which are fresh, but it will work.

Dried Cranberry Sauce (adapted)

– 1 1/2 cups dried cranberries

– 3/4 cup cranberry juice (can be cocktail, whatever you can find, I used the one with the least amount of sugar)

– 1/3 cup sugar

– Juice of one orange (and zest if you have a zester, I did not)

– Dash of salt

– 2 tablespoons of corn starch

– 4 tablespoons of water


1. Add craisins, cranberry juice, sugar, salt, and orange juice into a pot and bring to a boil.

Image

Image


2. Once boiling, reduce the heat to simmer and watch the cranberries start to plump up. 


Image


3. While the cranberries are simmering, make a slurry from the cornstarch and water, make sure to mix well!

Image

4. Add the cornstarch slurry a little bit at a time until the sauce becomes the right consistency, I did not use all of mine.

Image

Image

Enjoy~ 

Image

Happy Thanksgiving everyone!

Chicken soup

Chicken tortilla soup seems to be a ubiquitous item on restaurant menus in the American Southwest. I have high standards when it comes to chicken tortilla soup, and many restaurants do not make a good version of it. There are two lovely restaurants in Tucson which serve delightful food, except their chicken tortilla soups are terrible. One resembles a bowl of nacho cheese and the other is mainly turmeric and onion. How they got it so wrong, I do not understand. Perhaps they have never tried an authentic tortilla soup.

This past weekend was a holiday and since it was still chilly and I had the time, I made chicken soup. I can’t call it chicken tortilla soup because it didn’t contain tortilla and it had black beans, but that was my inspiration. This was the recipe I followed, although I adjusted a few things which are mentioned below. 

Image

Ingredients:

– 1/2 tablespoon oil (I used olive, vegetable oil is what the recipe says)

– 1/2 small onion (recipe says 1 whole onion, I don’t really like onion that much and 1/2 of one still seemed like a lot to me, adjust for your tastes)

– 1 minced garlic clove

– 1 minced jalapeño, seeds removed (recipe calls for 2, I didn’t notice much heat from 1, so adjust to your tastes)

– 6 cups of chicken broth (I made mine from Knorr cubes, just make sure to monitor the salt you add)

– 1 can fire roasted tomatoes (approx 14.5 oz)

– 1 can black beans (my can was more than 14.5 oz, but I like black beans so it was ok)

– 2 chicken breasts (recipe calls for 3, but I got monster chicken breasts so 2 were more than enough)

– 2 limes for juice and additional ones for serving

– 1 cup chopped cilantro

– 1 avocado (mine were a little past ripe, so ate about 3/4 of an avocado per bowl of soup)

– 1 cup Oaxaca cheese (I don’t remember if you can get this in the states, if you can’t use Monterrey cheese or any mild white melting cheese)

Image

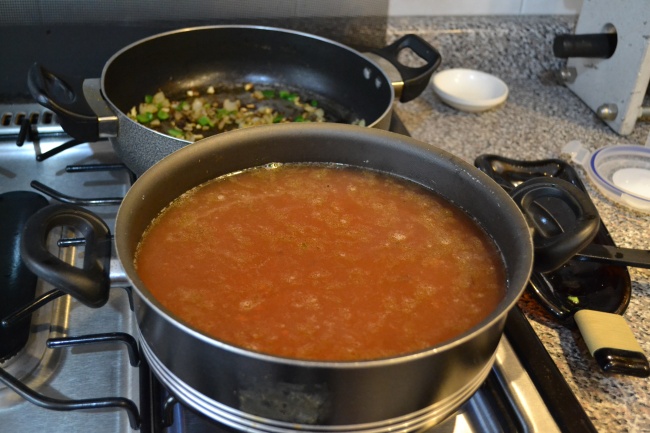
Step 1 – cook onions with oil in the pan. After about 2 minutes, add the garlic and jalapeños. When they’re soft, add them to the chicken broth. 

Image

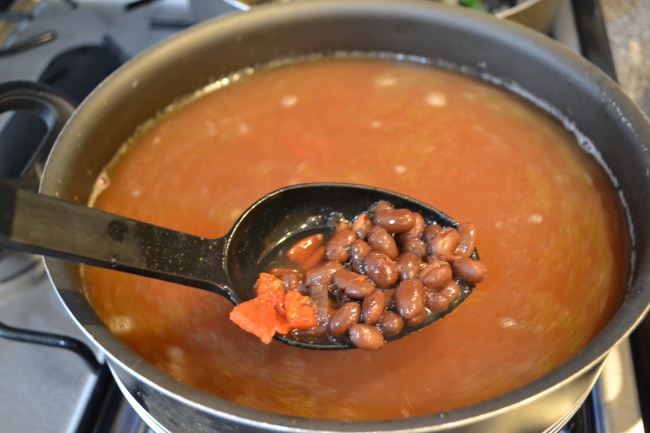
Step 2 – add the beans and tomatoes to the broth. Bring to a boil, then reduce to a simmer.

Image

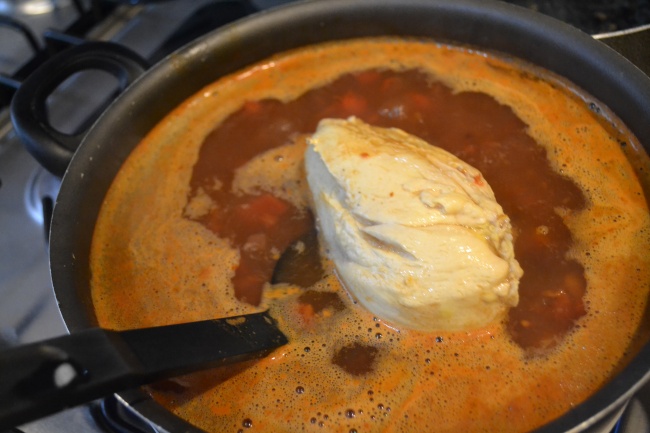
Step 3 – add the chicken and cook for approximately 25 minutes. It will turn white on the outside very quickly, so don’t assume it’s cooked all the way through. 

Image

Step 4 – When the chicken is cooked, remove it from the pot and shred it. I used forks since it was still pretty hot, but you can wait until it’s cool and use your hands. 

Image

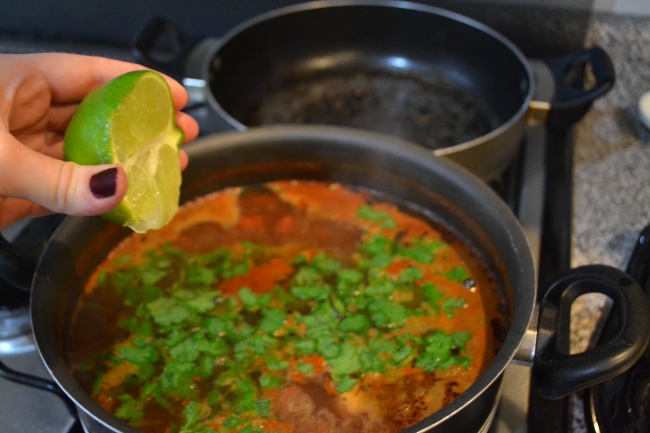
Step 5 – add the cilantro and lime to the broth, and then add the chicken back in. 

Image

Step 6 – prep the bowl, put the avocado and cheese in the bottom of your bowl.

Image

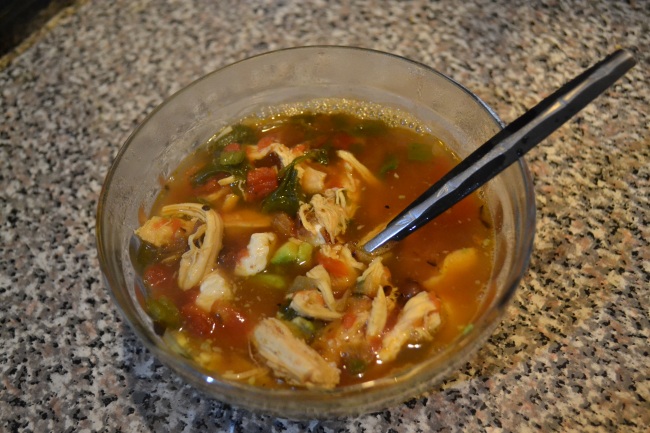
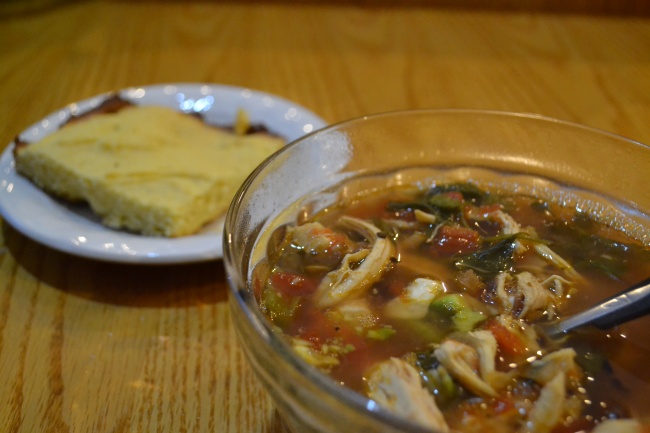
Step 7 – ladle the soup over the cheese and avocado, wait for the soup to melt the cheese:

Image

…and devour. 

Since I didn’t have the necessary tortilla to make this tortilla soup, I made some cornbread to accompany it. This is the recipe I used, it came out a little sweet for my taste, so next time I’ll probably only use the honey.

Ingredients:

– 1/2 cup softened butter

– 1 1/2 cups all purpose flour

– 2/3 cup granulated sugar

– 3/4 cup yellow cornmeal

– 1/4 cup honey

– 1/2 tsp baking powder

– 2 eggs

– 1/2 cup milk

– 1/2 tsp salt

Image

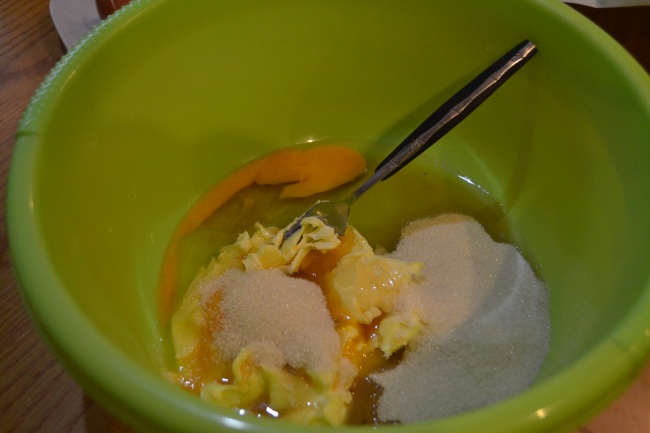
Step 1 – Preheat oven to 400 F or 204 C, then mix butter, honey, sugar, and eggs together in a bowl.

Image

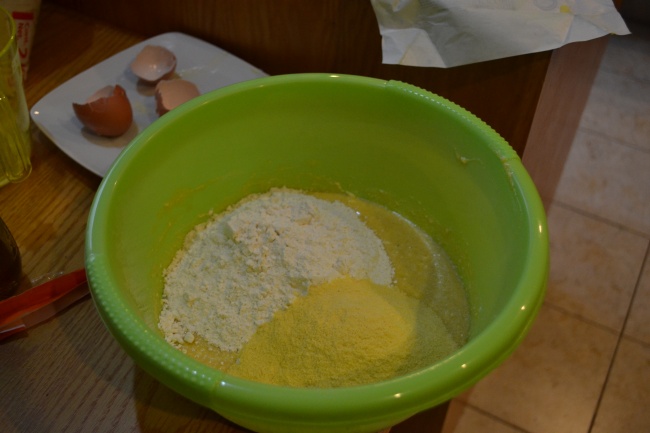
Step 2 – add salt, flour, cornmeal, and baking powder to the butter/sugar mixture and mix until creamy.Image

Step 3 – add the milk and mix until completely combined. 

Image

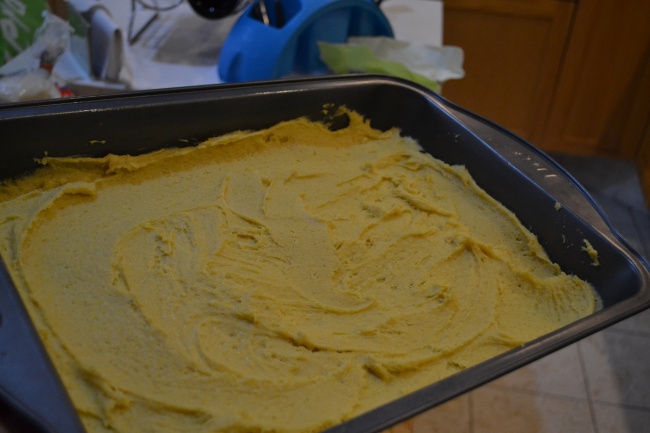
Step 4 – spread the mixture into your baking pan. I baked my bread for 15 mins since the dough was spread fairly thin in the pan, if you’re using muffin pans like the original recipe suggests, it could take 20-25 minutes to bake, and if you’re using a square pyrex it could take around 30 mins, just watch the time.

Image

Buen provecho!


Real fall

Be careful what you wish for, or what you write on WordPress. Two days ago I wished that fall weather would grace us with its presence in Guadalajara, and I kind of got what I was asking for. Yesterday I awoke to a cloudy sky and chilly breeze. The weather on my Iphone told me it would warm up to around 67F by 2 pm (I tried changing my weather app to Celsius, but that’s the only metric unit that still doesn’t mean anything to me), which seemed like pretty nice weather, so I left wearing a light sweater and ankle boots. Surprise! The weather app was incorrect and the weather remained in the 50’s with some wind and light rain in the afternoon. Today remains the same, with some patches of light blue visible in the sky (although I am dressed for the weather this time and I can enjoy it). 

Without prior knowledge of the turn of the weather, the Fulbright Guadalajara Cooking Club had planned a meeting at my house to make minestrone, atole, and bread. No recipe this time, since I left most of the cooking to the other ladies, but here are some photos of the night:

Image

We took advantage of the generous stove top, at one time having four of the six burners occupied. 

Image

Image

The pot of white liquid being stirred in this photo is the base for our champurrado, which is a variation of atole made with bits of Mexican chocolate.

Image

Cooking is always a team effort

Image

Champurrado

Image

Image

Image

End product – minestrone

Image

Some bread made with pesto and tomatoes to complement the soup.

What a perfect meal for fall!

Faking fall

Although Tucson and Claremont don’t have the classic turning of the leaves, gradually cooler nights, and other telltale signs of the arrival of fall, it’s a season I’m used to feeling. It usually comes later, long after the red Starbucks cups have debuted, the crisp breeze and an opportunity to pull out boots and coats are a part of a time that I cherish. Fall means spending more time inside with loved ones watching movies, drinking tea, baking cookies and pies, and in general just enjoying one another’s company. Of course you don’t need a particular season to partake in these activities, but the chillier fall certainly lends itself to them better than spring and summer.

This past week Guadalajara faked me out with some cool mornings and rainy evenings. I thought fall was surely close! Some mornings would be deceptively cold, I was found pulling out my boots and sweaters, excited for a change of clothes. But then around 11 in the morning, the sun would be shining brightly and the cool breeze would be gone. By two in the afternoon I was regretting my boots and tying my hair back in a ponytail.

In order to fake some fall spirit, I made an apple crisp. Tomorrow night I will be having the other Fulbright girls in Guadalajara over to my apartment for “cooking club,” something we came up with when we found out that most of us like to cook. The menu for tomorrow includes minestrone soup, atole (a warm, sweet, corn based drink), some sort of bread, and the apple crisp. Since the oven will likely be monopolized by the bread, I made the apple crisp tonight. I adapted the recipe from here, changing some ingredients.

Image\

The ingredients:

– 6 Gala apples

– 1 teaspoon vanilla extract

– 1 1/2 cups of honey

– 1 teaspoon cinnamon

– 1 teaspoon nutmeg

– 1/2 cup unflavored Greek yogurt

– 1 1/2 cups old fashioned oats

– 1/2 cup pre-made granola (if I were in the States I would suggest Cascadian Farm’s vanilla almond granola)

Image

Step 1 – pre-heat the oven to 350 F or 176 C and then start chopping apples! I found this to be the fastest and easiest way to get near equal sized pieces:

Image

Cut the apples in half and then half again, like so.

Image

Then cut into the apple on the diagonal to cut out the core. Then slice into thirds and chop into smaller pieces.

Image

Step 2 – once the apples are chopped, add the vanilla and set them to the side.

Image

Step 3 – Mix honey, nutmeg, and cinnamon in a separate bowl.

Image

Step 4 – mix the oats, granola, and Greek yogurt. I originally ended up with too little of this crisp mixture, so I ended up doubling what was in the original recipe.

Image

Step 5 – assemble! Put the apples down as the base layer in the pan (1), then add the honey mixture – using a spoon helps to distribute the mixture evenly across the apples (2), then add the oat/yogurt mixture over top – again a spoon is helpful (3)

Image

Image

Image

Off to the oven for about 45 minutes!

DSC_0679 DSC_0678


Buen provecho!

Knock-off enchiladas for one

I want to start this post with a confession. Let the record show that I have a drawer in my fridge dedicated solely to cheese #iamlizlemon

Image

That’s cottage cheese, brie, goat cheese, mozzarella, and panela. I would have more, but I have restrained myself, for now.

With that taken care of, I would like to share my failed attempt to make enchiladas. Enchiladas are probably one of my favorite Mexican dishes, when done correctly. I’ve had some bad enchiladas. One example that sticks out in my memory was from Scripps dining hall: a flour tortilla filled with cheese and onions (I despise onions about 85% of the time) covered in what was surely sauce from a can. It was awful.

Enchiladas aren’t quick and easy, but I attempted to make a quick and easy version. It didn’t quite work out how I wanted, but it worked out for a quick lunch to mildly satisfy the craving.

The ingredients:

Image

Panela – Mexican cows milk cheese, very tasty, takes a while to melt, but it was the only Mexican cheese I hadImage

Herdez green salsa – available in the States, can usually be found in the Heilman fridge. The Mexican version seems a lot spicier

Image

Tortillas – corn, always, don’t even ask about flour. This is roughly a kilo, I only used 3

Image

Step 1. Warm the tortillas. Here I am using a comala common household object much like a griddle. It is perfect for warming tortillas and making quesadillas, but you won’t be making eggs on it or anything like that. You could also use the microwave.

Image

Step 2. Add the ingredients, here panela and the green salsa.

Image

Step 3. Roll up the tortilla with the part where the two ends meet facing down so it stays together. Since I was doing this in a toaster oven on foil this was more important, if you’re making them in a casserole dish it’s much easier to make them stay closed by nestling them together. Side note – you could also use a toothpick, however, I accidentally ingested a toothpick while eating a taco dorado (fried taco – literally “golden” taco) and that made for quite a stressful weekend. My father gave me some comforting words, “Well gees, I hope it doesn’t perforate your intestine.” Yea, me either, Dad…

Image

Step 4. Cover those things with cheese! Panela melts disappointingly, so didn’t turn out too exciting. I popped them into the toaster oven for 30 mins at 350 F.

Image

They came out of the toaster oven looking awful and shriveled, but they were tasty – and part of a colorful meal!

Comida Italiana

One of the main struggles I encountered while living in Brazil was the food, since there was a serious lack of vegetables (beets and potatoes can only get you so far) and of flavors other than salty and sweet. The one type of food that helped me break up the monotony of potato/rice/bean/meat-centric meals was Italian. Tomato and cheese are universally tasty and comforting. I’ve noticed in my travels that Italian food is popular around the world, no matter what the regional tastes are. 

One of my favorite food memories in Brazil took place in Salvador at an Italian restaurant where a friend and I each had our own bowl of what came out to be $25 spaghetti marinara. It was delicious. Although the Brazilians liked to put their own twist on “Italian” food (like mayonnaise on pizza), this meal was perfectly simple: tomato, cheese, garlic, pasta. 

In my house, one of our go-to appetizers for Christmas/New Years/Easter/Birthdays is tomato bruschetta. Recently, my parents planted a large basil plant in our backyard, which makes this special dish that much easier and fresher. This past week I had some of my cousins over to my apartment and prepared this dish to share with them.

Image

Step 1. Tomatoes (seeds on the table optional). I saw these pretty little cherry tomatoes at the supermarket so I went with these instead of full size tomatoes. They are more manageable to get into small pieces and if you don’t use all of them they’re easier to store. 

Image

Step 2. Garlic, salt, and pepper.

Image

Step 3. Olive oil and balsamic vinegar dressing. The usual ratio for a balsamic dressing is 3 parts olive oil to 1 part vinegar. I try to follow this, but I go more by sight than exact measurements. 

Image


Step 4. Basil. I had a hard time finding this at a supermarket since it was buried underneath a pile of mint. But basil is basil and as soon as I smelled the plant I knew it was basil. I’m considering buying a basil plant, it’s just such a lovely herb to have around. I roll up a few leaves and then julienne them to add some color and aroma to the salad.

Image

Step 5. Let is marinate. Cover the container and put it in the fridge for a few hours. As Emeril says, “let it get happy.” Then pile it on top of some bread and enjoy. I added some chopped mozzarella to this batch right before serving. I also accompanied the bruschetta with some goat cheese and roasted red pepper crostinis. Image


Tortilla Tortilla

Image

Much like there are differences in English from the U.S., Australia, and England, Spanish words can differ from country to country and even between regions in countries. One example is the Mexican tortilla (left) and (an attempt at a) Spanish tortilla (right).

Over my spring break junior year of college, a Spanish family friend taught me how to make tortilla española. The traditional version is a rich omelette filled with potatoes and onions and uses a fair amount of olive oil in the process. The process was easy enough to follow so I made my own version (minus onion, adding spinach or chorizo) several times last year in my apartment. Although it is a time consuming process, there’s something about warm potatoes and eggs that can make the mornings a little bit better. Since the weather here has been gloomy and a little chilly, I decided to try and make a tortilla to warm me up in the mornings. There were a few technical difficulties and the end result looks pretty horrible (I swear… if I just had my cuisinart pans!) but, it still tasted good!

Image

Mistake #1 – I used the wrong kind of potatoes. The ones we used when I was taught were russet potatoes, but I haven’t found those here. Right when I first walked into the frutería I found the red potatoes and for some reason assumed they were the only potatoes there. Sure enough, right around the corner I found the waxy yellow potatoes, which I thought would be better, but already feeling committed to the red potatoes since I had them bagged up in my basket I took both kinds home with me to try out.

Image

Mistake #2 – I didn’t cut the potatoes to be the same size. Since the red potatoes were pretty small I chopped them up into smaller pieces, thinking that the smaller the pieces the faster they would cook. Once I got through the red potatoes, my hand was a little tried and I cut the yellow potatoes into bigger pieces. This was clearly a mistake because different sized things take longer to cook, and sure enough some of the red potatoes burned while the yellow potato pieces were still raw in the middle. I divided the potatoes into two batches to cook them faster and make another tortilla for freezing.

Image

Image

Mistake #3 – I didn’t chop the spinach. This was something I realized would be a problem once I was eating it later. The spinach I got had woody stalks which are a little unpleasant to eat.

Image

Once the egg/potato/spinach mixture is in the pan for a bit, the egg on the sides of the pan will start to cook. Use the spatula to loosen the sides and life the bottom of the tortilla to see if the bottom is cooked and you can lift it out of the pan and put it on a plate.

Image

Image

Here is where having the right sized and shaped pan is critical. You turn the pan over on top of the raw side of the tortilla on the plate. You then lift the plate up and flip it over so that the raw side is now face down in the pan. Return the pan to the heat and finish cooking. In an ideal world, the everything will stay together and the cooked side of the tortilla will be a beautiful golden brown.

Image

This is not an ideal world. However, I let the bottom cook and then flipped it over again to make sure everything was cooked.

Image

That looks a little better, but then when I got it out of the pan it fell apart again. It’s going to take a little more practice to perfect my tortilla recipe here in Guadalajara.